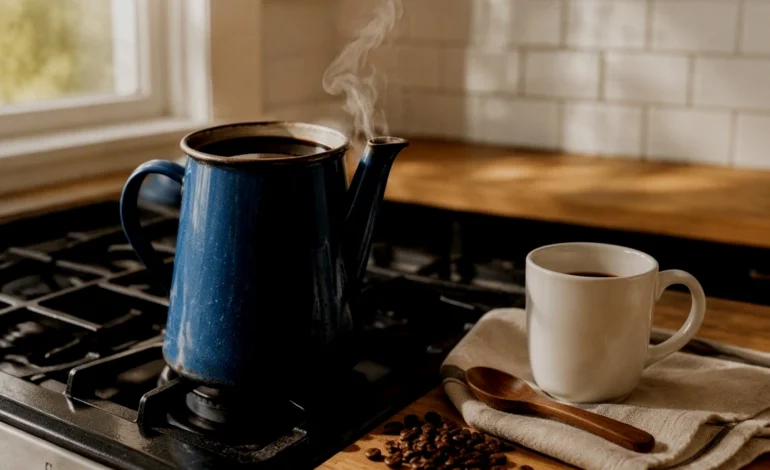
There is a moment every coffee drinker should try at least once. It is the moment you want coffee, and the coffee maker is not an option. Maybe the power is out. Maybe you are moving and the boxes ate your machine. Maybe you just want to know you could do it the old way.
That happened to me on a Tuesday morning. I stood in my kitchen, the coffeemaker dead on the counter, and one thought in my head: the stove still works. So I boiled coffee in a saucepan, the way people did for hundreds of years.
The first pot was honestly bad. Bitter enough that I poured half of it down the sink. But I kept testing, morning after morning, and by the fourth try I had a cup I would happily pay for at a cafe. The difference was not the coffee. It was a handful of small details that nobody had explained to me.
This guide is the article I wish I had read that morning. You will get the exact steps, the right amounts, the mistakes to avoid, and the simple fixes for bitter or weak coffee. All of it tested at home, on a normal gas stove.
Quick Answer:
How to boil coffee on the stove: Heat water in a saucepan until it is almost, but not quite, boiling. Turn off the heat, stir in 2 tablespoons of coarse ground coffee per 1 cup (8 oz) of water, cover the pot, and let it sit for 4 minutes. Pour in 2 tablespoons of cold water to help the grounds sink. Wait 1 minute, then pour slowly into your mug so the grounds stay behind. Total time: about 8 to 10 minutes.
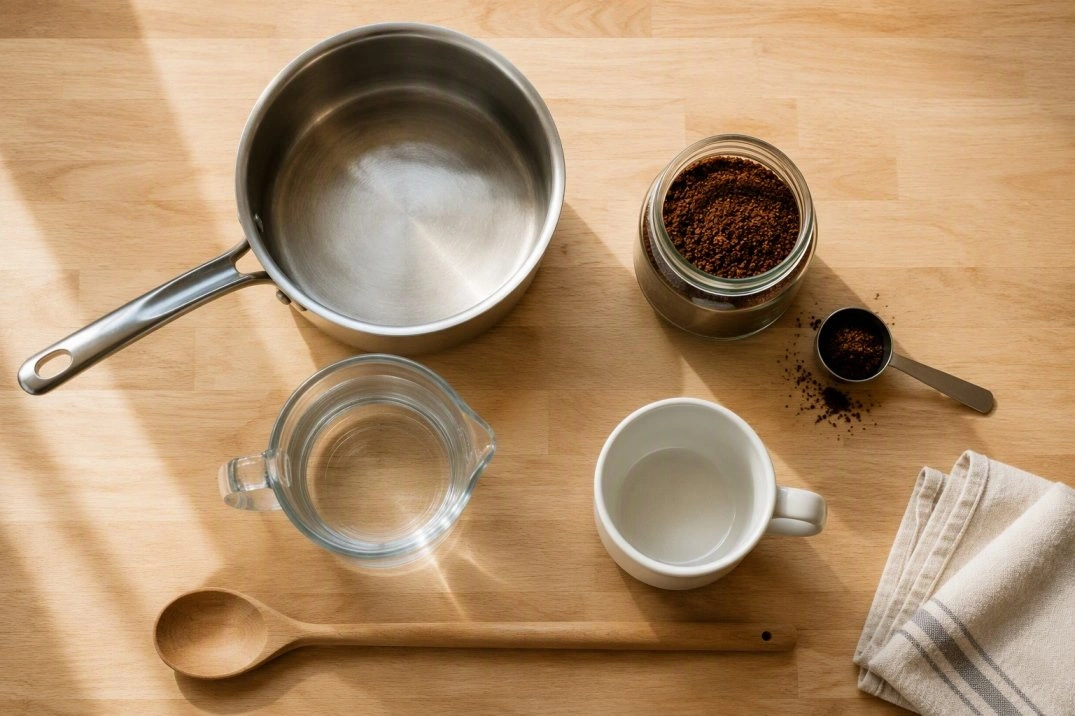
What You Need Before You Start
This is the part I love about boiled coffee. You probably already own everything.
- A saucepan or small pot. Something with a lid and a pouring lip. A 2-quart pan is plenty for 2 cups of coffee.
- Ground coffee. Coarse ground if you can. More on that in a moment, because grind size is the one thing most people get wrong.
- Water. Filtered or tap water both work. Coffee is mostly water, so if your tap water tastes odd, your coffee will too.
- A long spoon. A wooden spoon is easiest on a non-stick pan.
- A mug. A plain 8 to 12 ounce mug is fine.
- A kitchen scale (optional). If you want repeatable results, this is worth it. If not, a measuring spoon works fine.
- A fine strainer (optional). A tea strainer or small mesh sieve catches stray grounds if your pour gets messy.
Ingredients at a glance:
| Item | Amount for 2 cups (16 oz) |
| Water | 2 cups (16 oz) |
| Coarse ground coffee | 4 tablespoons (about 1/4 cup) |
| Cold water to settle grounds | 2 tablespoons |
| Salt (optional) | 1 small pinch |
| Milk or sweetener | To taste |
Why Boiled Coffee Works (and Why It Is Called Cowboy Coffee)
Boiling coffee is not a hack. It is the original method.
For most of coffee history, boiling was how coffee was made. According to Wikipedia’s overview of coffee preparation, boiling or simmering ground coffee in water was the main brewing method used until the 1930s, and it is still a common way to brew in some European and Middle Eastern countries. The drip machine on your counter is the newcomer here. Boiling came first.
You have probably heard this style called cowboy coffee. That name comes from the American frontier and the cattle trails, where a cook would set a big pot of grounds and water over an open fire and let it come together. It was simple, it worked with almost no equipment, and it kept a lot of tired people moving west.
Here is the Simple truth about why it works: hot water pulls flavor and caffeine out of ground coffee, and it does not care whether the water is poured through a paper filter or sitting in a saucepan. What it does care about is water temperature, grind size, and time. Get those three right and boiled coffee can taste clean and rich.
Get them wrong, and you get the bitter, muddy cup I made on my first try.
How to Boil Coffee on the Stove: Step by Step
Here is the exact method I use now. It takes about 8 to 10 minutes from cold water to a full mug, and most of that time you are not doing anything.
Step 1: Measure Your Water and Add It to the Pot
Pour 1 cup (8 oz) of cold water into the pot for each cup of coffee you want. I usually make 2 cups, because the second cup always disappears.
Do not fill the pot more than halfway. Coffee foams up when it gets hot, and you want room for that. A pot that is too full will boil over onto your stove, and that is a mess you do not want to clean up before you have had coffee.
Step 2: Heat the Water Until It Is Almost Boiling
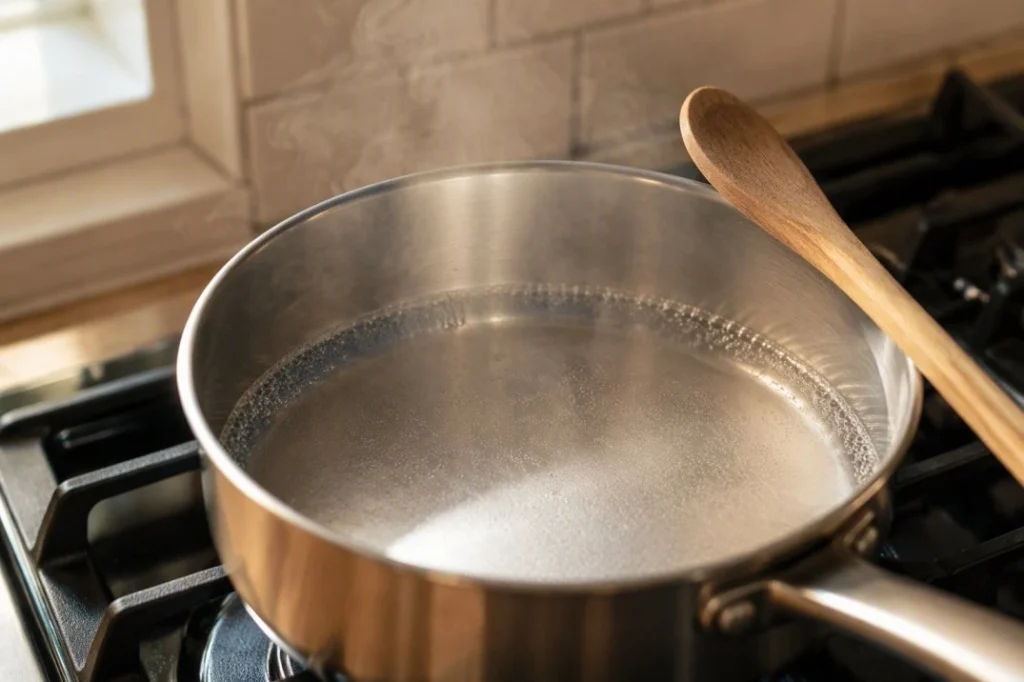
Put the pot on the stove over medium-high heat and let it come up to temperature. Watch for the first sign of movement: tiny bubbles forming in a ring around the inside of the pan, and a little steam rising off the top.
Step 3: Turn Off the Heat and Add the Coffee
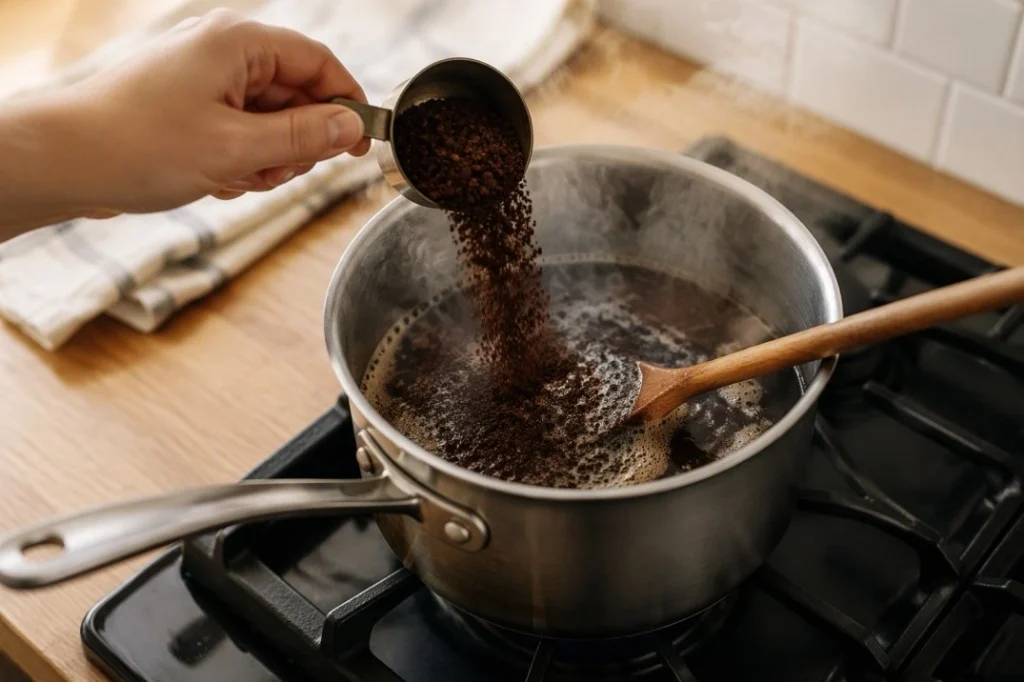
Turn the burner off. Then add 2 tablespoons of coarse ground coffee per cup of water and give it one gentle stir so all the grounds get wet.
Two things matter here.
First, turning the heat off before you add the coffee. If you keep a hard boil going with grounds in the pot, you cook the coffee instead of brewing it, and that is where most bitterness comes from. My first bad pot had this mistake written all over it.
Second, use a spoon and be gentle. You are not trying to whip it. One or two slow circles is enough.
Step 4: Cover the Pot and Let It Steep
Put the lid on and set a timer for 4 minutes.
This is the waiting part, and it is the part that decides how your coffee tastes. Four minutes is my sweet spot for a medium-coarse grind. Three minutes gives you a lighter, brighter cup. Five minutes starts getting heavy and bitter.
One useful reference point: a cowboy coffee brewing guide from Cafely lists a 4 to 5 minute brew time, a 1:16 coffee-to-water ratio, and a medium-coarse grind, with the water at about 200°F. That lines up almost exactly with what I landed on by testing.
Step 5: Settle the Grounds With a Splash of Cold Water
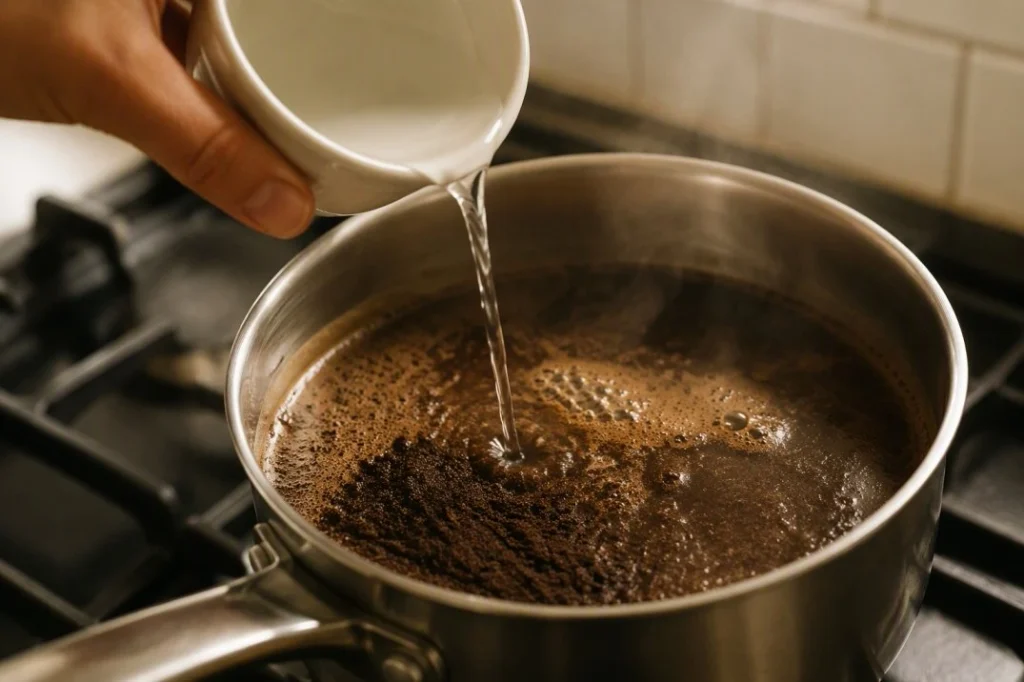
After 4 minutes, take the lid off and pour 2 tablespoons of cold water gently over the top of the coffee.
You will see the grounds start to drop. The cold water cools the surface and makes the floating grounds heavier, so they sink instead of swimming into your mug. This one small step is the difference between a clean cup and a mouthful of grit.
Give it another minute to settle before you pour.
Step 6: Pour Slowly and Leave the Grounds Behind
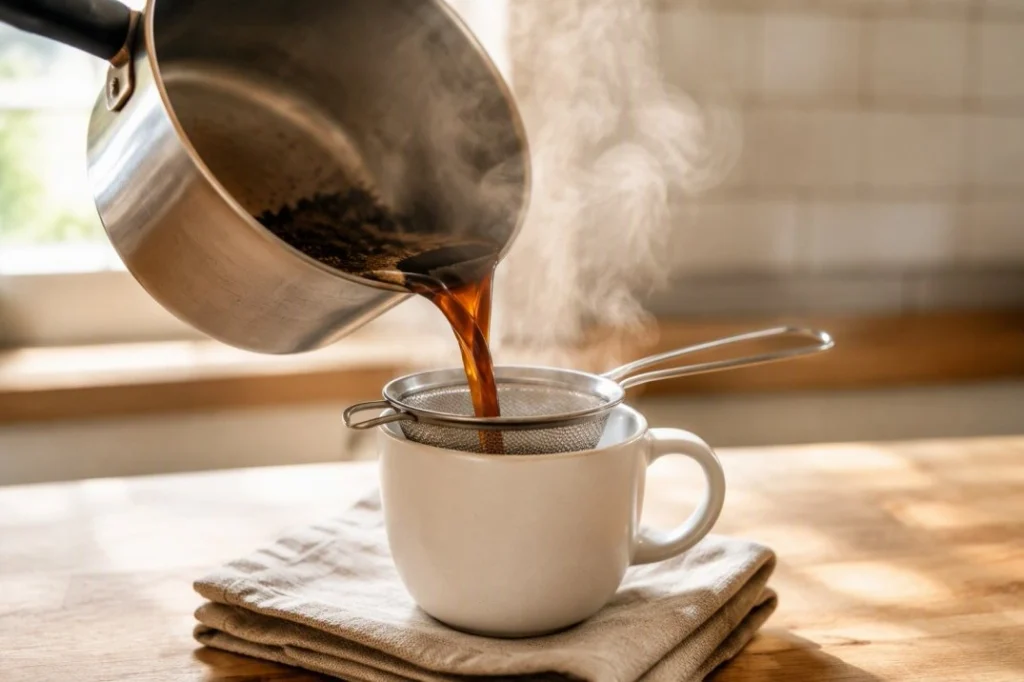
Hold the pot low and pour in one slow, steady stream. Stop when you get near the bottom and leave the last half inch in the pot. That last bit is almost all grounds.
If some grounds still make it into your mug, pour through a small tea strainer or mesh sieve. It takes a few extra seconds and gives you a much cleaner cup.
Add milk, sugar, or nothing at all. Then sit down and drink it while it is hot, because boiled coffee is best fresh.
Getting the Ratio Right
The single biggest jump in quality I got came from measuring instead of guessing. If you only change one thing from this article, make it this one.
| Cups of coffee | Water | Coffee (coarse ground) | Brew time |
| 1 cup (8 oz) | 1 cup | 2 tablespoons | 4 minutes |
| 2 cups (16 oz) | 2 cups | 4 tablespoons | 4 to 5 minutes |
| 4 cups (32 oz) | 4 cups | 8 tablespoons | 5 minutes |
A few notes from my own testing:
- 2 tablespoons per cup is a strong, diner-style cup. That is how I like it. If you want something lighter, start with 1 1/2 tablespoons per cup.
- The coffee-to-water ratio most sources use is about 1:16 by weight. In Simple kitchen terms, that means roughly 1 gram of coffee for every 16 grams of water.
- Change one thing at a time. If your coffee is too strong, cut the coffee, not the time. If it is too weak, add coffee before you add minutes.
- Use more coffee for bigger pots, not more time. A long steep in a big pot just makes a big pot of bitter coffee.
Grind Size: The One Thing Most People Get Wrong
If your boiled coffee tastes bitter, muddy, or gritty, the grind is usually the reason.
Coffee grounds are tiny pieces of bean, and the water pulls flavor out of their surface. Fine grounds have a lot more surface, so flavor comes out fast. Coarse grounds have less surface, so it comes out slower.
That matters a lot when your coffee sits in the water instead of passing through it. Wikipedia’s coffee preparation overview explains the same idea plainly: coffee that is ground too fine for the brewing method exposes too much surface area to hot water and turns out bitter and harsh, while coffee that is too coarse makes a weak cup.
Here is what I use:
- Coarse grind (like sea salt) is the safe choice. It settles quickly, so less of it ends up in your mug.
- Medium grind works if you pour through a strainer. It gives you a fuller flavor, but more grit gets through.
- Fine grind is the wrong tool here. Save it for a moka pot or Turkish coffee. In a saucepan it turns into sludge.
If you buy pre-ground coffee, look for a bag marked coarse, French press, or percolator. That is the size you want.
Fixing Bitter, Weak, or Gritty Coffee
Here is my troubleshooting list, built from pots I actually got wrong.
| Problem | What caused it | The fix |
| Bitter, sharp taste | Boiled with the grounds in, or steeped too long | Take the pot off the heat before adding coffee; cut the steep to 3 minutes |
| Weak and watery | Not enough coffee, or grind too coarse | Add 1 extra tablespoon of coffee per cup |
| Muddy or gritty cup | Grind too fine, or grounds not settled | Switch to a coarse grind; use the cold water trick; pour through a strainer |
| Tastes burned | Coffee sat on a hot burner after brewing | Pour it into a mug or carafe right away |
| Flat and dull | Old coffee, or stale grounds | Buy smaller bags, store them sealed and cool, and use them within a few weeks |
| Grounds in the mug | Poured too fast, or poured the last bit | Pour slowly and leave the bottom half inch in the pot |
5 Mistakes I Made So You Do Not Have To
1. I let the pot boil hard with the coffee already in it. This was my first pot, and it is the reason I nearly gave up on stovetop coffee. Boiling with grounds in the water overcooks them. Turn the heat off first, then add the coffee.
2. I guessed at the amount of coffee. My early cups swung wildly between weak and harsh because I was eyeballing it with a soup spoon. Measuring spoons fixed that in one morning.
3. I used the fine grounds I had in the cabinet. I was out of coarse coffee and figured it would not matter. It mattered. The cup was like drinking silt, and the bottom of the pot needed a real scrub afterward.
4. I skipped the cold water. I thought it was a silly old trick. Then I watched a pot of grounds climb into my mug. Now I do it every single time, without fail.
5. I left the coffee sitting on the warm burner. The last cup of my second pot tasted burned and flat, even though the first cup from that same pot was good. Once the coffee is done, it is done. Pour it out and turn the burner off.
Small Tricks That Make Boiled Coffee Taste Better
Once the basics are right, these are the extras worth knowing.
- A pinch of salt. Some cooks add a small pinch of salt or a piece of crushed eggshell to the grounds before brewing. The idea is that the alkaline minerals soften the sharp, bitter edge. I tested the salt version, and it does round off a harsh cup. Use a tiny pinch, not a shake.
- Cinnamon, cocoa, or vanilla. Add a pinch of cinnamon or cocoa powder to the grounds before brewing, or a drop of vanilla in the mug. Both cover a slightly bitter edge nicely.
- Milk or cream. Boiled coffee is bold, and a splash of milk tames it.
- Strain it for a cleaner cup. A fine mesh strainer or a paper filter over the mug turns a rustic pot into a smooth one.
- Warm your mug first. Fill it with hot water while the coffee steeps, then dump it out. Small thing, real difference.
- Clean the pot right away. Warm water, a stiff brush, and a little baking soda handle coffee stains well. Skip the soap if you can, since a soapy pot can leave a taste in your next batch.
A Quick Word on Safety
Boiled coffee is simple, but it involves very hot water and a hot burner.
- Never leave a pot of water heating alone. Boiling water can splash or boil over, and an empty pot on a hot burner can scorch.
- Turn the handle in. Keep pot handles turned toward the back of the stove so nobody bumps them.
- Watch the steam. Steam burns are worse than most people expect. Stand back when you lift the lid.
- Use a pot you trust. Stainless steel, enamel, and heavy non-stick pans are all fine. Skip thin glass on a stovetop burner.
- Let it cool before you clean. Pouring cold water into a hot pot is hard on cookware and can crack some materials.
This article is educational and is not medical advice. If you have questions about caffeine and your health, talk with a healthcare professional.
Other Ways to Make Coffee on a Stove
Boiling in a saucepan is the simplest method, but it is not the only one. Here is how the common stovetop options compare.
| Method | Grind | Time | Taste | Best for |
| Saucepan (boiled) | Coarse | 4 to 5 minutes | Bold, full body, slightly rustic | No equipment, power outages, camping |
| Moka pot | Medium-fine | 5 to 7 minutes | Strong and rich, close to espresso | Small, concentrated cups |
| Percolator | Medium | 7 to 10 minutes | Traditional, can turn bitter if it cycles too long | Making several cups at once |
| Turkish or Greek | Powder fine | 3 to 4 minutes | Very strong, thick, served unfiltered | Small cups, slow sipping |
| French press (water heated on the stove) | Coarse | 4 minutes | Clean and full-flavored | People who already own a press |
If you are choosing one to start with and you own nothing special, boil it in a saucepan. That is the method this guide is about, and it needs the least from you.
Frequently Asked Questions
How long should you boil coffee on the stove?
You should not boil it for long at all. Heat the water to about 200°F, just short of a rolling boil, then turn off the heat and add your grounds. Let them steep for 4 minutes, then settle and pour. A hard boil with coffee in the pot is what makes bitter coffee.
How much coffee do you use per cup?
Use 2 tablespoons of coarse ground coffee for every 1 cup (8 oz) of water for a strong cup. For a lighter cup, start with 1 1/2 tablespoons per cup and adjust from there.
Can you boil coffee without a coffee maker?
Yes. A saucepan, water, ground coffee, and a spoon are all you need. Boiled coffee has been made this way for centuries, and it was the main way coffee was brewed until the 1930s.
Why does my boiled coffee taste bitter?
The most common reasons are steeping too long, using too fine a grind, and leaving the pot on a hot burner with the grounds still in it. Cut the steep time to 3 or 4 minutes, switch to a coarse grind, and take the pot off the heat before you add the coffee.
How do you keep grounds out of the cup?
Use coarse grounds, splash 2 tablespoons of cold water on top after steeping to help the grounds sink, let it sit for a minute, then pour slowly and leave the last bit in the pot. A small mesh strainer catches anything left over.
Can you make boiled coffee with instant coffee?
Yes. Boil the water, take it off the heat, and stir in 1 to 2 teaspoons of instant coffee per cup. It will not taste like brewed coffee, but it is quick and it works when that is all you have.
Can you reheat leftover boiled coffee?
You can, but it will not taste as good. Reheated coffee tends to taste flat and a little muddy. If you make extra, pour it into a sealed thermos instead of reheating it later.
About This Guide
Who wrote it
This guide was written by William Johnson, a home coffee drinker who has brewed coffee in a kitchen for years without ever relying on a single machine to get it right.
How this was tested
Every step, ratio, and timing note in this article was tested in my own kitchen on a normal home gas stove. I used one 2-quart saucepan, a wooden spoon, a set of measuring spoons, and a bag of coarse ground coffee from the grocery store. I brewed the same recipe four mornings in a row, changed one variable at a time, and wrote down what actually changed in the cup. The 4-minute steep, the cold water trick, and the coarse grind are the three things that made the biggest difference, and the mistakes listed above are mistakes I genuinely made.
A note on claims
This article is educational and is not medical advice. Talk with a healthcare professional about your own caffeine intake.
Related Article : Can You Put Hot Coffee in a Glass Cup?